One of the
things I've always dreaded doing when
building is area lighting. I can have all of
my sourced lighting up and going, all my spot
lighting and texture lighting set and done,
but there are always dark spots (usually in
the center of a fairly large room with a high
ceiling.) So, the next step (for me) was to
put a whole bunch of low-brightness lights
close to the floor (usually 150 brighness,
about 64 units off the floor) and space them
out to put a dim cover. Just enough to put
light where I need it, but not enough to
overpower the sourced lights. And then there
is the matter of coloring them.
All in all,
it works well, but it takes a long time to
get it just right, and it's just a general
pain in the ass. There is however, another
way that gives nearly perfect coverage, and
is (most importantly) fast and easy to adjust
to get it looking just right.
Let's look at
a particular area.
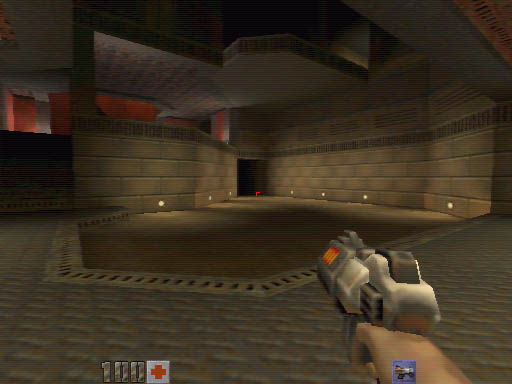
Notice
how the center of the room is dark. Now, if
we were to put a light, bright enough to
cover the dark area, in the center of the
dark spot, it would flood out the sourced
lighting from the lights in the wals near the
floor. So, now we have a problem just like
the one I described above, but instead of
using cover lighting using point lighting
like I described above, we'll do something
different -- texture lighting. I know, that
would look pretty bad to light up the floor.
Don't worry, we're not going to use the
floor.
First
thing we need to do is find a
texture that will give us the color we need
when we light it. In this case, we'll use the
texture for the wall-mounted lights.
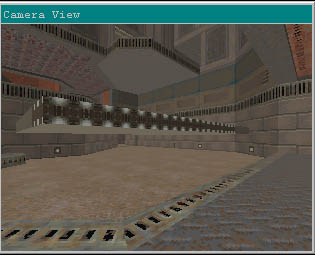
next,
create a brush that covers the
general area, a bit off the floor (no, I'm
not going to tell you exactly how far,
because it's something you have to play
with.)
You
should have something like this:
Now
we set the properties for the brush. Set the
following flags on all faces
of the brush:
light:
well, why else would we be doing this?
sky: This
way it will still emit light, even though
it won't be drawn
nodraw: a
big light brush probably wouldn't look
too good in the middle of a room
detail:
since it is a sky brush, it will be a
factor in your PVS unless this is
checked, which means you'll be having sky
pop up in all kinds of wierd places.
Trust me...check this.
mist: if
you don't check mist, people will be
wondering who stuck a big clip brush in
the middle of the room.
Keep the
light value very
low.
NOTE:
this will dramatically
increase your QRAD3 times. Just thought I'd
let you know
Now compile
it, and you should come up with something
like this:
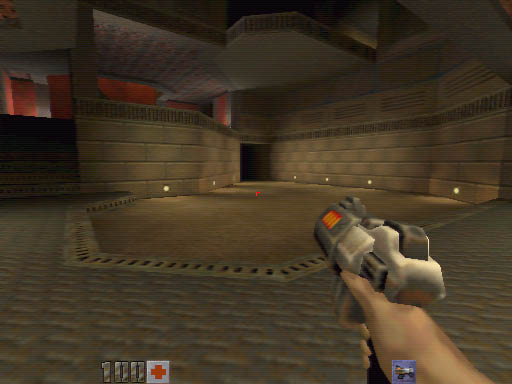
It's
a subtle difference, but every little bit
counts (and it looks pretty good too)
-GrrandMaMa
You can
download the example here. Also if you
have any problems or need some help please
post to the discussion board.
Return to Tutorials
Page...

